A custom menu is essential to the navigation of a WordPress website, or any type of webiste.
Although creating a custom menu in a WordPress website is easy to do, it can be a little complicated at a first attempt . I remember experiencing difficulty when I started my first WordPress website. It should not have been that way, I just didn’t have instructions to follow.
I don’t want that to happen to you. You don’t need to suffer frustrations with WordPress as it is quite simple to use.
Creating a Custom Menu For Easy Access to Content on a WordPress Website
As the saying goes, don’t put the cart before the horse. Before you can create a custom menu you need to have content on your site.
Adequate content must be on a website before making it live on the world wide web.
Without sufficient content, your site won’t be seen. This means that it won’t be found by the search engines or people browsing the internet. The minimum amount of content on a site before publishing is 3 pages and 5 posts. Preferably you will have a greater number of posts than five.
Assuming you have sufficient content let’s look at how to create a custom menu.
Go to the Dashboard of your website
Click on Appearance
Then click on Menus

In the new screen Click on ‘create a new menu’ (See Arrow 1)
Then Click on ‘Menu Name’ (See Arrow 2) and enter a name for the Menu
Then Click on ‘Create Menu’ (See Arrow 3)

Now Click on ‘Screen Options’ at the Top Right-hand side of your Screen and select the options you require.

My chosen options, Pages, Posts and Categories appear in the image below.
Please be aware you will see additional options which I have not shown here due to this article relating to the basics of creating a custom menu.

Refer back to the Left-Hand side of your screen
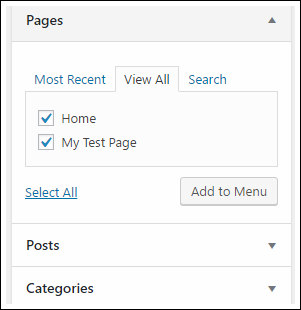
In the image below: Under ‘Pages’ the 3 tabs Most Recent / View All / Search are what you will use the most to create your custom menu.
In creating this Menu, I selected both pages I had prepared for this demonstration, being Home and My Test Page
I then clicked on the Add to Menu button which sent both pages to the Menu Structure (appearing 3 images below).
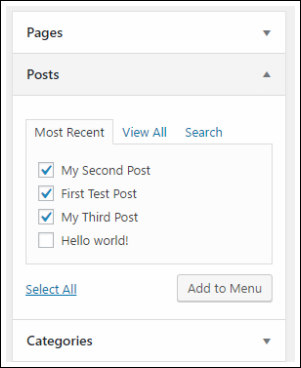
Referring to the image below: I then clicked on the Down Arrow alongside Posts and the Most Recent posts appeared
Clicking on the Add to Menu button sent those posts immediately to the Menu Structure (appearing 2 images down).
The image below this text is the Menu Structure which includes the 2 Pages and 3 Posts referred to in the previous two images.
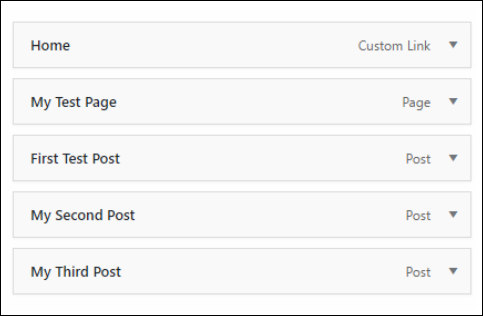
To style the Menu Structure drag tabs towards the right side, or return them to the left side.
Also, the tabs can be dragged upwards and downwards, as required.
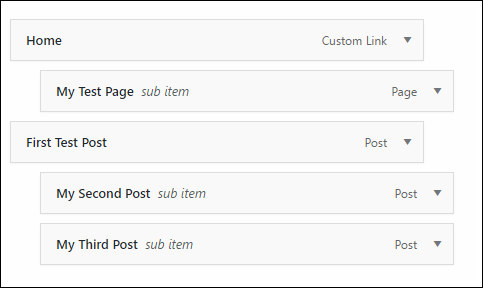
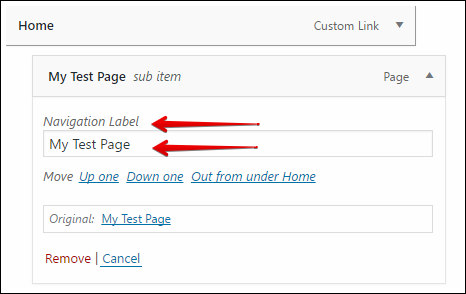
The Name on a Navigation Label can be changed as shown in the image below.
‘My Test Page‘ shown by the lower arrow can be changed here to suit your posts’ labels.
You have now completed a custom menu for your first website.
In a future post I will show how to have more than one custom menu on a website.
In the meantime, I thank you for reading this post. I hope it has been helpful.
Please leave your comments and questions in the space provided below.